Sunday, December 29, 2013

framing update


Our main living space is framed up and has the sheathing up on the roof.  It feels good to stand in the space and begin to feel what it's going to be like. 


Saturday, November 30, 2013

attic truss

 The house is really starting to take shape. 

 The opening in the floor here is where the stairs will go.

Above looks towards the back bedroom.  The first truss is a girder truss which will carry some of the main room roof load.  Beyond that first girder are attic trusses.  There's not much headroom up there, but enough to put our mechanical equipment for our ducted mini-split and a little extra storage. I had the truss manufacturer add depth in the truss above the attic space so that we can easily put insulation in the roof.  The attic will actually be conditioned space which means that our attic will also have drywall on the ceiling and walls.


Our skylight in the shower will be going above where Neil is standing. 

Wednesday, November 13, 2013

territorial views

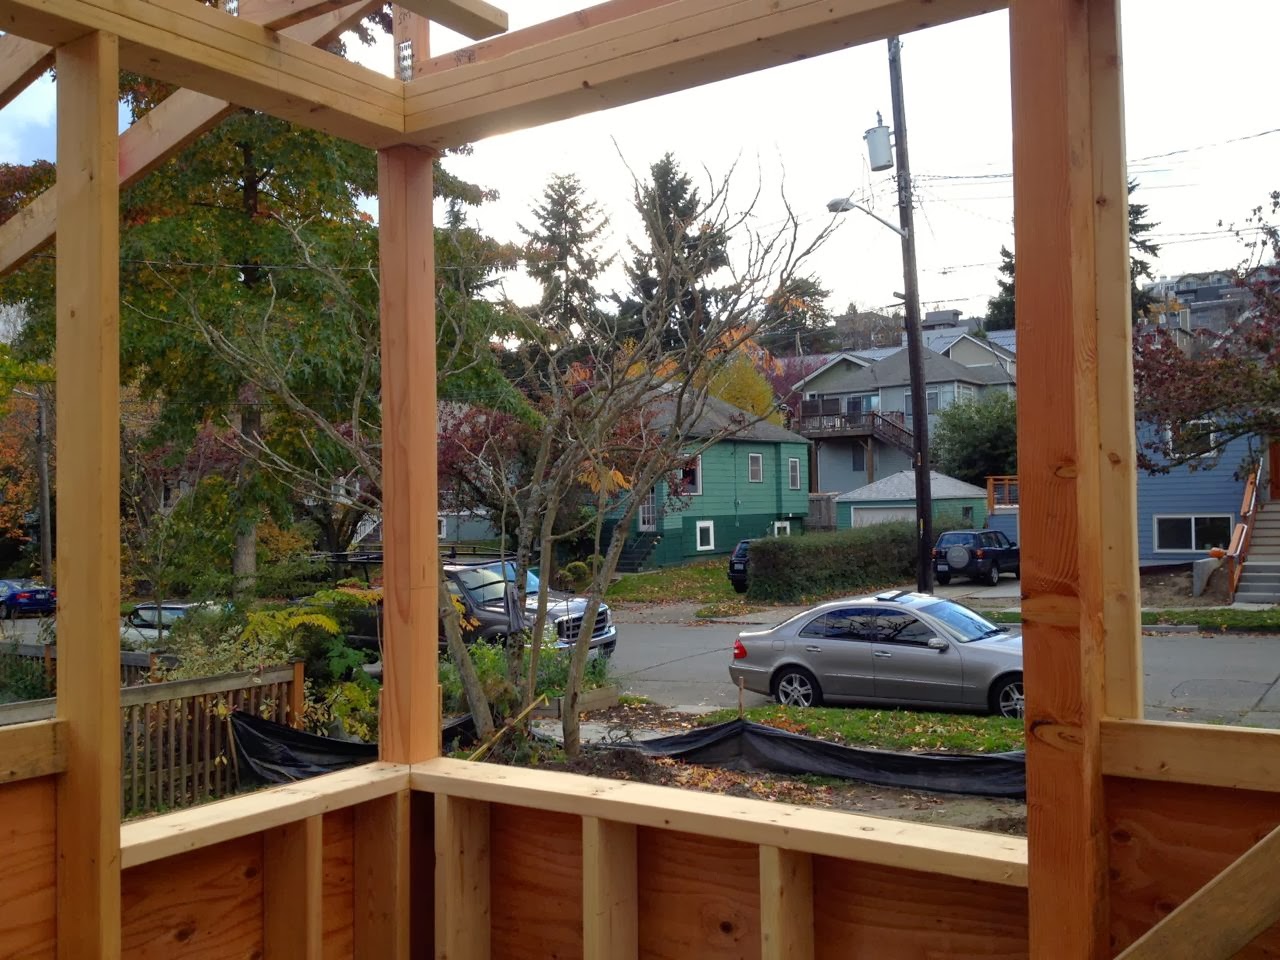
Being in the middle of a city block that is located in a valley, our views are what real estate agents call "territorial".  This first picture will somewhat be the view from the dining room and out on the deck.  I love seeing the gables and different house forms going up the hill....I'm not crazy about that electrical pole though.

Below will be our main view from our 2nd story space.  I'm standing in the approximate area of our kitchen island.  This also shows why I angled the building slightly.  We still over look our neighbors yard, but the slight skew directs the view more diagonal to the southeast.

The floor trusses under the dining room needed to be hung from a beam to give us the maximum flexibility for our home offices below.


The garage: aka Neil's space.


This is looking out the apartment's kitchen sink windows.


Monday, October 28, 2013

2nd floor trusses delivered

We received our delivery of the 14" open web floor trusses on Friday from Louws.  Exciting!  These span the width of the garage (21'-25'). We went with these instead of TJIs for the flexibility of running our plumbing, electrical and ducting.


Saturday, October 26, 2013

Thursday, September 19, 2013

interior grade beams

I was out helping for the footing pour this week.  It was an intense few hours.  Concrete is not very forgiving and we had to wet set some 100 rebars that will later be bent and formed into the slab.  


 Originally we were going to do these interior footings or grade beams as part of the slab in one monolithic pour.  But as Neil was digging out for the footings the compacted gravel was sloughing too much.  We are running rigid insulation under the slab, but not under the footings and we were concerned about voids under the rigid.

Since we decided on separating into 2 pours, Neil decided to form up and pour these himself instead of bringing in our concrete sub who has done the exterior walls and will do the slab. Neil used 2x4 & 2x6 material in the forms so that he could reuse the lumber in the framing stage.


The blue plastic is our 10 mil vapor barrier.  It's job is stop water vapor and other soil gases from seeping into our slab.

Thursday, September 5, 2013

first floor plumbing

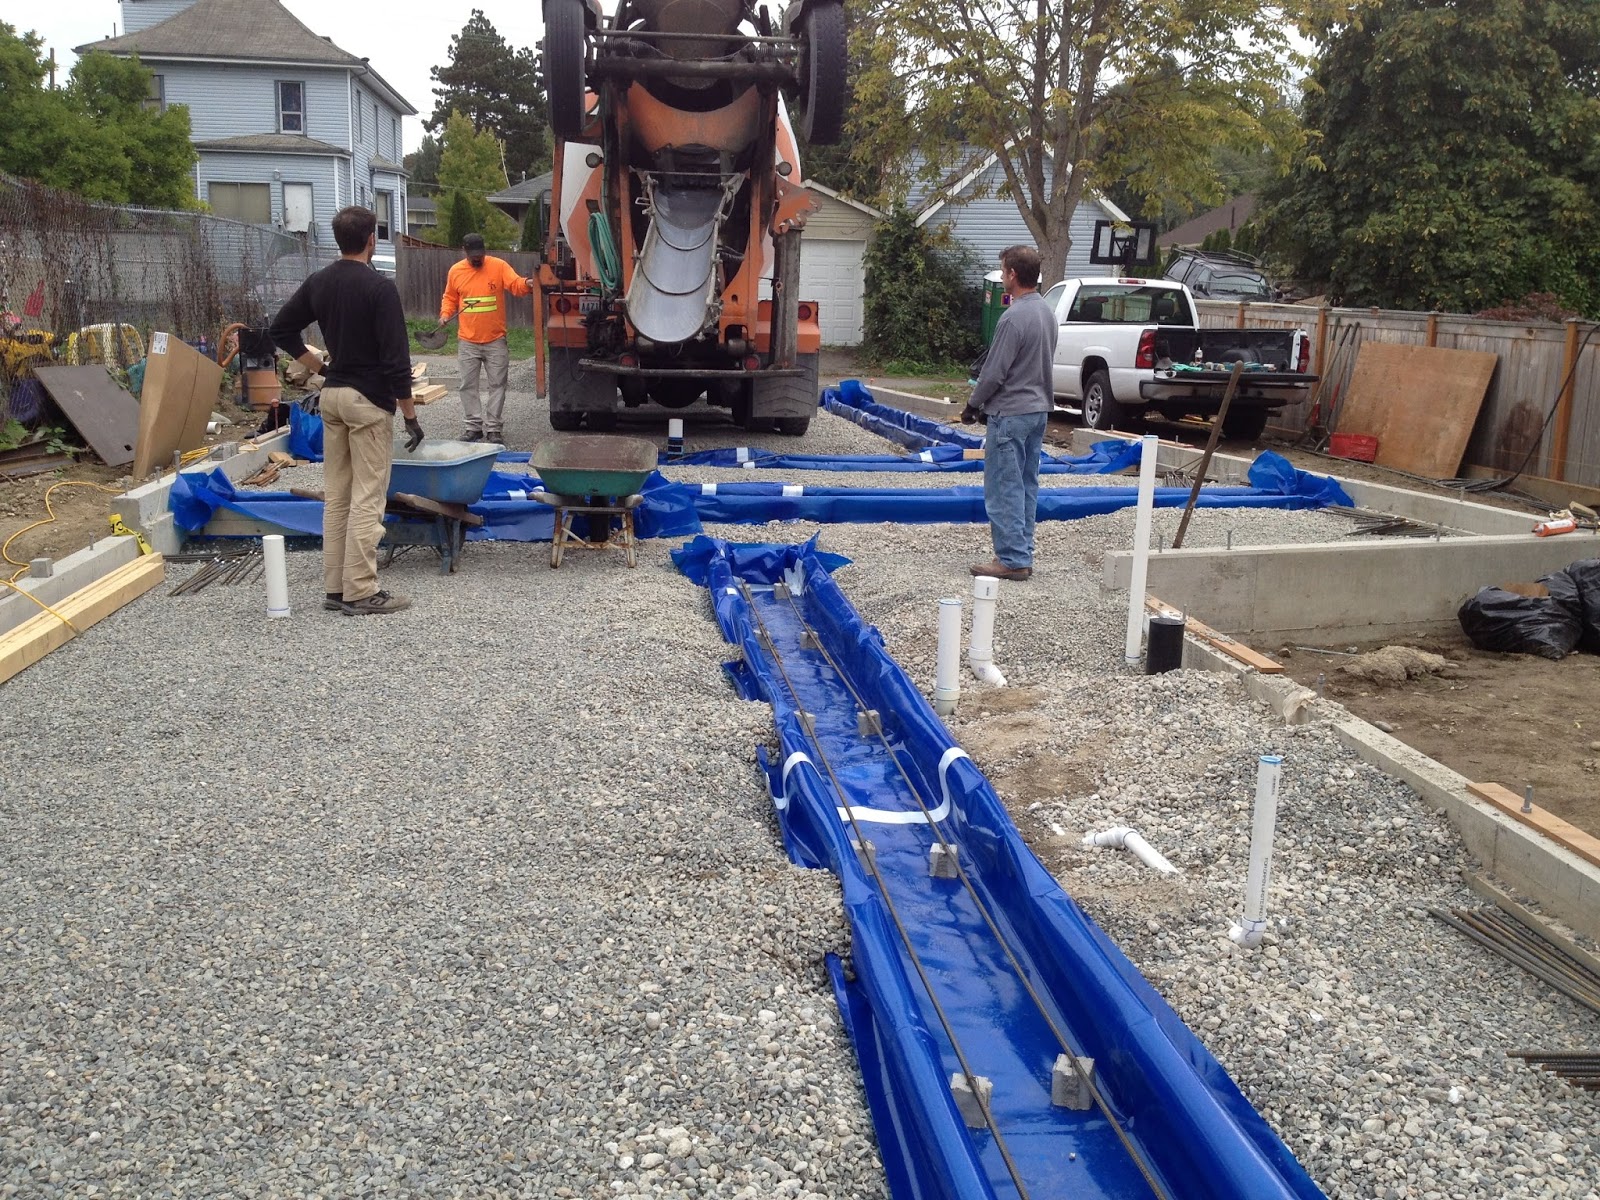
This looks like the beginnings of some kind of art installation.  Because we are doing a slab on our entire first floor, we needed to layout all of our sewer drain lines first.  The tall pipes are set up to "test" the system and will be removed in a day or so.

This crazy business is under the floor of the bathroom in the ADU (Accessory Dwelling Unit, aka Mother-in-law unit). The diagonal line is the kitchen drain coming in.  The lowest is the tie in from the second story bathroom which then heads out the foundation wall.  There is a backwater prevention valve in the upper run above the loop.  The manhole out in the street is higher then our first floor toilet, so a special valve had to be installed to prevent an ugly situation if the street sewer ever overflowed.

Above is our second story drainage to the left and our laundry room drainage to the right.


Saturday, August 31, 2013

drainage and sewer

It's been a month of site work and foundation.  Above shows the footing drain installed.

Once the free draining rock was placed over the footing drain and the filter fabric laid on top, they trenched and ran the pipe for the sewer connection.  You can see the clean-out in the below right corner.

At the same time they also ran the downspout drains.  Our downspouts along the North side (shown below) will pickup the majority of our roof drainage and will dump into a rain garden in our front yard.

Here Neil is measuring for the as-built drawing of our drainage so we know the location when we start landscaping.  Also of note is the retaining wall Neil built along the fence. He made it out of steel I beams and 4x8 pressure treated lumber.  You can see the filter fabric that is over the free draining rock that covers the perforated drain pipe running along the base of it. There was a 4' grade difference diagonally across the site, so we leveled out our side yard and will have a step down towards the front of the property.  


The site is finally starting to look cleaned up and ready for the slab work.  All the bad dirt was removed and structural fill was brought in.

Sunday, August 18, 2013

stem walls

Here they are pouring the foundation stem walls.  You can see the arm of the pump truck coming down in the upper right corner.
We will eventually be pouring a concrete slab for the entire first floor.  After having the geotech out to the site as well as our structural engineer, we now need to remove more of the organic material (dirt  with tree roots) from the center and bring in structural fill.
The man in the blue on the left is controlling the pump and the man holding the pump is directing the concrete into the forms. 
Below is a corner of the form with rebar in place.

5/8" diameter anchor bolts are then set into the wet concrete.  You can see them sticking up out of the concrete in the pictures below.  They are typically placed every 48" with a few locations closer together where there is a shear wall.  The anchor bolts will tie the wood framed walls to the foundation.  This enables the house to be more resistant in an earthquake and will keep the framed house from moving off its foundation.


Tuesday, August 13, 2013

introducing CHAPUCAS

This is probably the most daunting design project I have ever worked on…the design of our own home. Having my husband and myself as clients is a lot harder than one would think. How do I get all those cool ideas I have been wanting in a house into a cohesive design and within budget? All of our decisions are based on balancing our, at times, conflicting priorities.


PRIORITIES
  • A home we will love - cool, beautiful and comfortable
  • Lots of natural light
  • Stay within our budget
  • Energy Efficient
  • Healthy, Low Maintenance & Environmentally Responsible interiors and exteriors
  • A house that fits into the neighborhood

 
DESIGN PARAMETERS
  • The lot size is 40’x120’ with alley access, 20’ front yard set back and 16’ rear yard with 5’ side yard setbacks. 
  • Open up to the southern exposure along the long side of the lot.
  • Attached ADU (accessory dwelling unit, aka mother-in-law unit)
  • Main living space on the second floor with separate bedroom
  • Connection to the outside on the second floor
  • Garage big enough for the Mini Cooper, motorcycle and all of Neil’s tools and work materials. 
  • Home offices for both of us

DESIGN CHALLENGES
  • Display my extensive book collection without overwhelming Neil’s minimalistic sensibilities.
  • A large enough home to entertain in, but small enough to be intimate for just the 2 of us.  The right size home.
  • Maintaining privacy within a city environment while bringing in lots of natural light
  • Create 2 dwelling units that are separate, but have an indoor connection

The main space is really what the whole house is designed around. I wanted lots of natural light and ventilation. A room that is both intimate and spacious. A room where the bookshelves and cabinets are built in and become the walls and the TV can be hidden with moveable panels. The house is designed around how we live and want to live.


FOR CURRENT CONSTRUCTION

 PHOTOS CLICK HERE